Getting Started with the Node.js Driver
On this page
Overview
This guide shows you how to create an application that uses the MongoDB Node.js driver to connect to a MongoDB cluster hosted on MongoDB Atlas. The Node.js driver is a library of functions that you can use to connect to and communicate with MongoDB.
Tip
MongoDB Atlas is a fully managed cloud database service that hosts your MongoDB deployments. You can create your own free (no credit card required) MongoDB Atlas deployment by following the steps in this guide.
Follow the steps in this guide to connect a sample Node.js application to a MongoDB Atlas deployment. If you prefer to connect to MongoDB using a different driver or programming language, see our list of official drivers.
Download and Install
Install dependencies
Ensure you have the following dependencies installed in your development environment:
Node.js v16.20.1 or later
npm (Node Package Manager)
To learn how to install Node.js and npm, see Downloading and installing Node.js and npm in the npm documentation.
Create a project directory
In your shell, run the following command to create a
directory called node_quickstart for this project:
mkdir node_quickstart
Then, run the following commands to navigate into the directory and initialize your Node.js project:
cd node_quickstart npm init -y
When the initialization command successfully completes, you have a package.json
file in your node_quickstart directory.
Install the Node.js Driver
Run the following command from your project directory to install the driver:
npm install mongodb@6.14
This command performs the following actions:
Downloads the
mongodbpackage and the dependencies it requiresSaves the package in the
node_modulesdirectoryRecords the dependency information in the
package.jsonfile
After you complete these steps, you have a new project directory with the driver dependencies installed.
Create a MongoDB Deployment
You can create a free tier MongoDB deployment on MongoDB Atlas to store and manage your data. MongoDB Atlas hosts and manages your MongoDB database in the cloud.
Create a free MongoDB deployment on Atlas
Complete the Get Started with Atlas guide to set up a new Atlas account and load sample data into a new free tier MongoDB deployment.
After you complete these steps, you have a new free tier MongoDB deployment on Atlas, database user credentials, and sample data loaded in your database.
Create a Connection String
You can connect to your MongoDB deployment by providing a connection URI, also called a connection string, which instructs the driver on how to connect to a MongoDB deployment and how to behave while connected.
The connection string includes the hostname or IP address and port of your deployment, the authentication mechanism, user credentials when applicable, and connection options.
Find your MongoDB Atlas connection string
To retrieve your connection string for the deployment that you created in the previous section, log into your Atlas account and navigate to the Clusters section and click the Connect button for your new deployment.
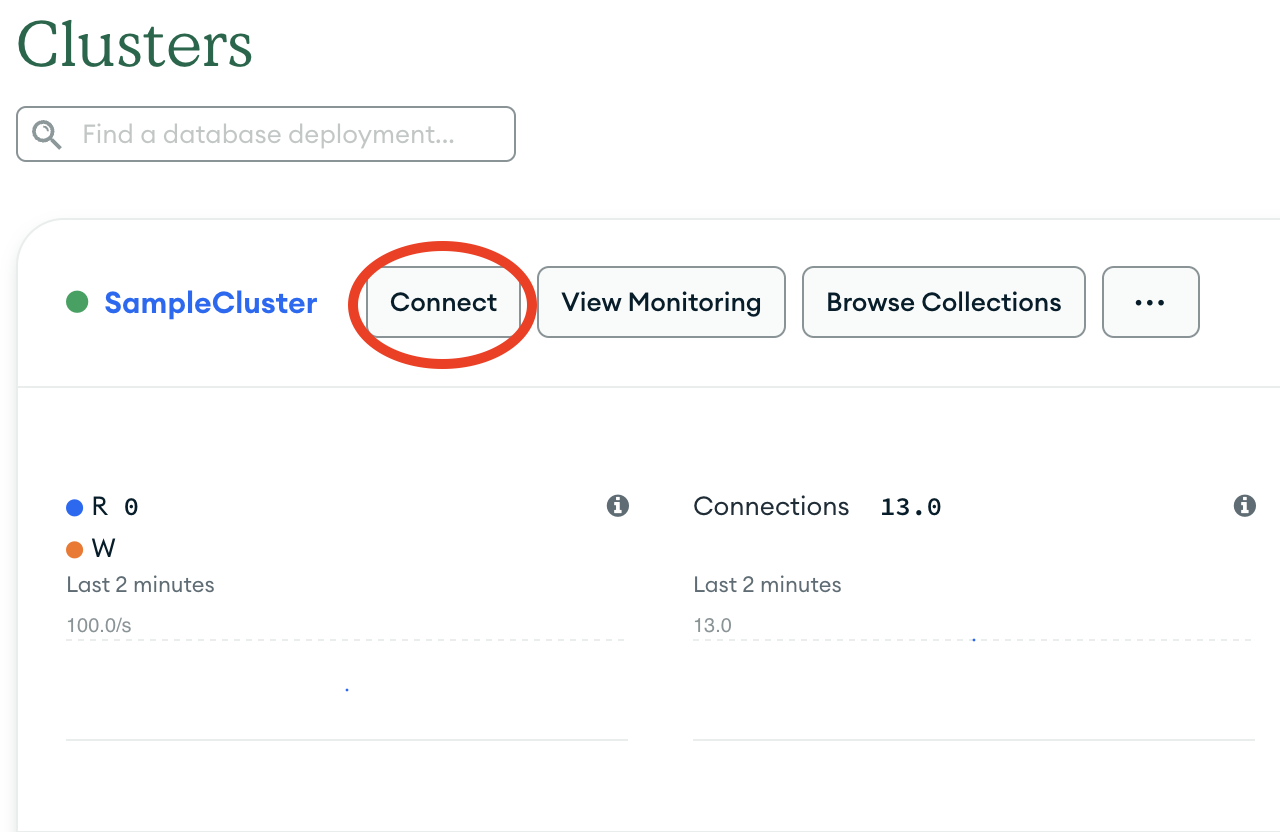
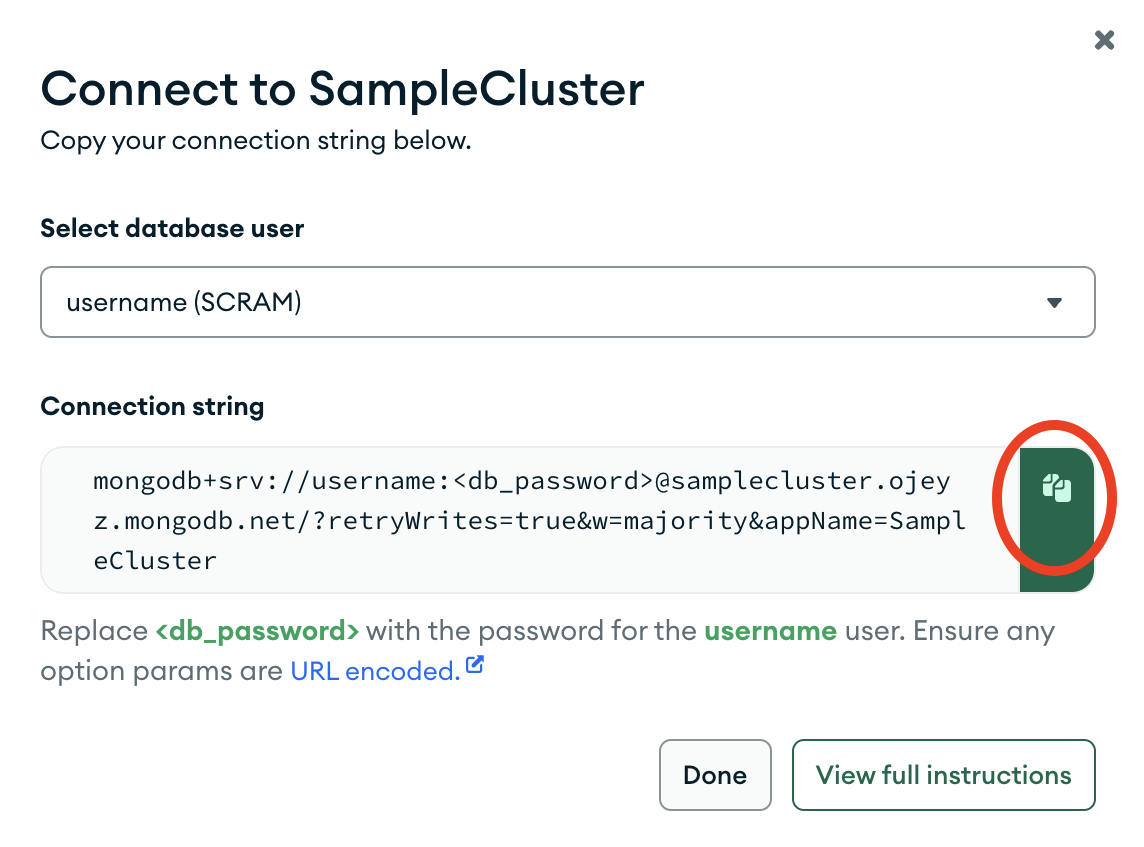
After completing these steps, you have a connection string that contains your database username and password.
Connect to MongoDB
Create your Node.js application
In your node_quickstart directory, create a file called
index.js for your application.
Copy and paste the following code into the index.js file:
const { MongoClient } = require("mongodb"); // Replace the uri string with your connection string const uri = "<connection string uri>"; const client = new MongoClient(uri); async function run() { try { const database = client.db('sample_mflix'); const movies = database.collection('movies'); // Queries for a movie that has a title value of 'Back to the Future' const query = { title: 'Back to the Future' }; const movie = await movies.findOne(query); console.log(movie); } finally { await client.close(); } } run().catch(console.dir);
Assign the connection string
Replace the <connection string uri> placeholder with the
connection string that you copied from the Create a Connection String
step of this guide.
Run your Node.js application
From your project directory, run the following command to start the application:
node index.js
The output includes details about the retrieved movie document:
{ _id: ..., plot: 'A young man is accidentally sent 30 years into the past...', genres: [ 'Adventure', 'Comedy', 'Sci-Fi' ], ... title: 'Back to the Future', ... }
If you encounter an error or see no output, verify that you specified the
proper connection string in the index.js file and that you loaded the
sample data.
After you complete these steps, you have a working application that uses the driver to connect to your MongoDB deployment, query the sample data, and print out the result.
Next Steps
Congratulations on completing the quick start tutorial!
Note
If you run into issues on this step, ask for help in the MongoDB Community Forums or submit feedback by using the Rate this page tab on the right or bottom right side of this page.
In this tutorial, you created a Node.js application that connects to a MongoDB deployment hosted on MongoDB Atlas and retrieves a document that matches a query.
Learn more about the Node.js driver from the following resources:
Discover how to configure your MongoDB connection in the Connect to MongoDB section.
Discover how to perform read and write operations in the CRUD Operations section.